Monday, July 9, 2012

How I Carve a spoon part 3

HOW I CARVE A SPOON

Part 3

Part three is the exciting conclusion of this series on spoon carvingthe finishing process. 

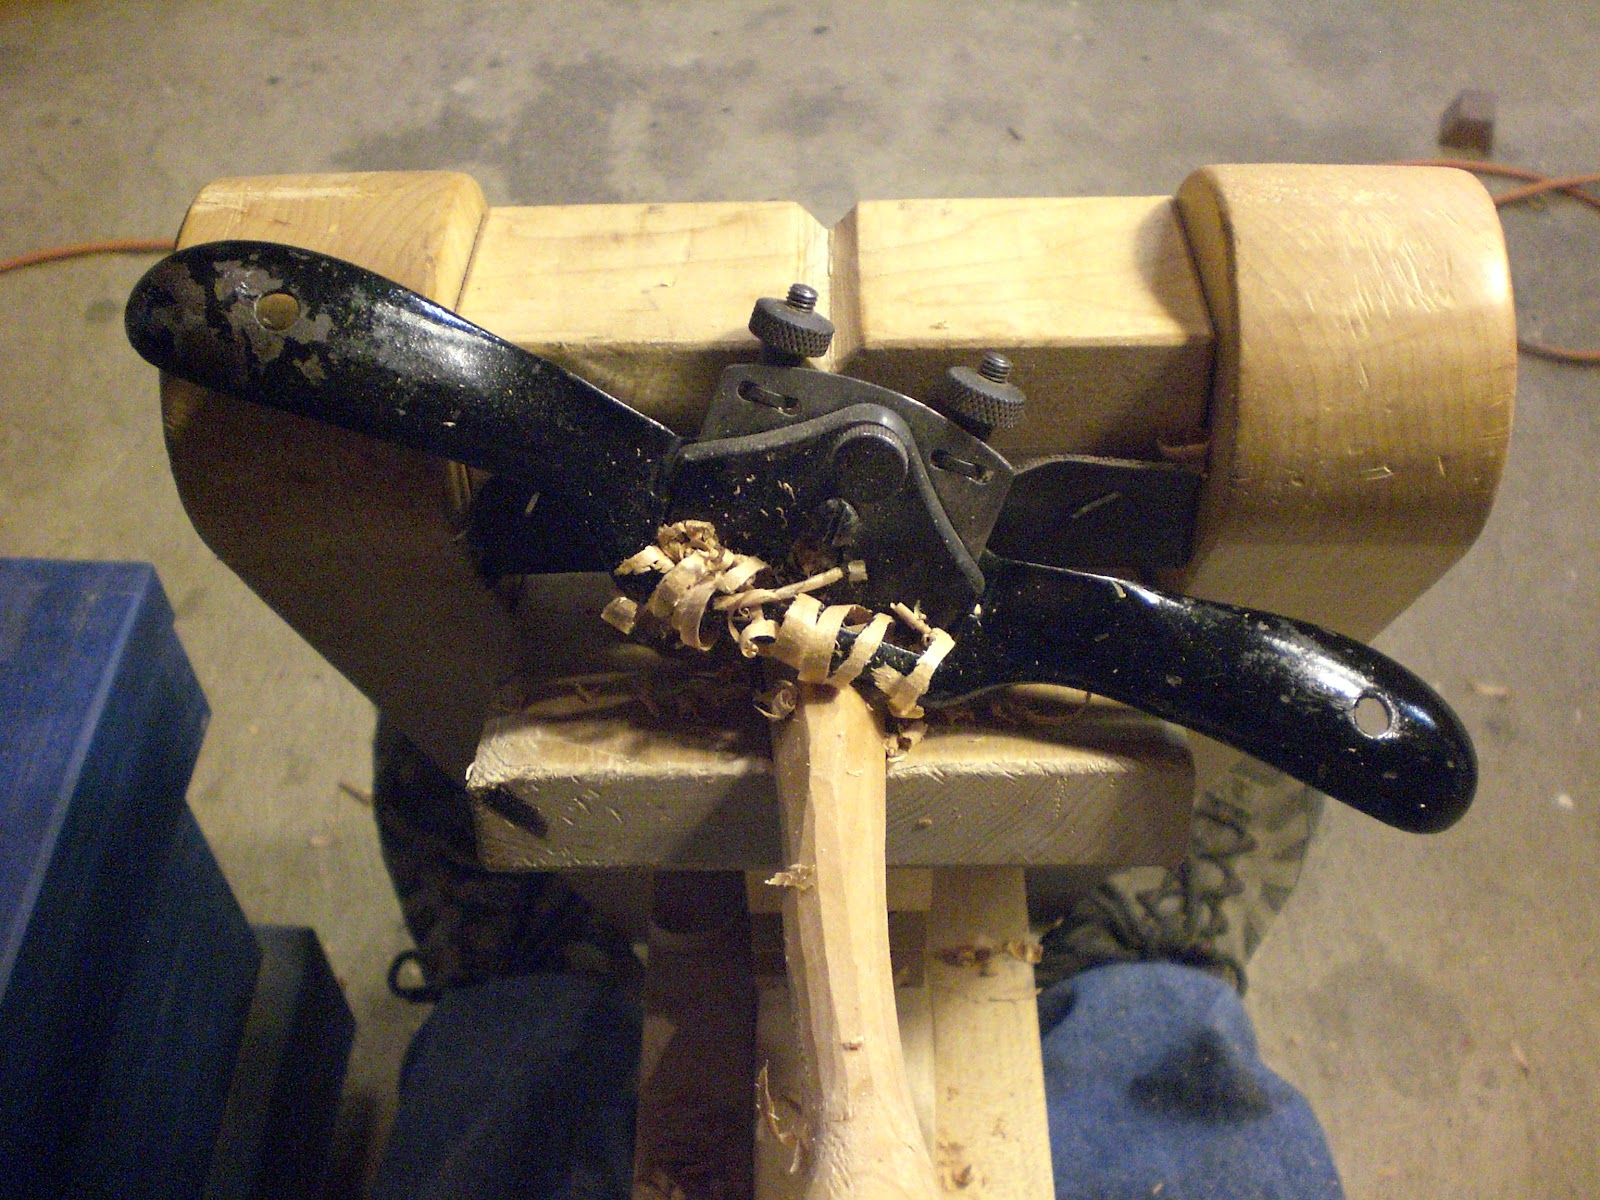
Spoon on the left is still fresh off the band saw, spoon on the right has been worked over on the shavehorse and is now ready for some sanding.
There are three kinds of woodworkersthose who don't have a card scrap, those who have a scrape and think they know how to use it, and those who have a scrape and know how to use it.  I know this because I have been all three of these woodworkers, and have only recently moved in to the "in the know" category.  After watching this video by Michael Pekovich on the right way to sharpen your scraper ( http://www.finewoodworking.com/SkillsAndTechniques/SkillsAndTechniquesArticle.aspx?id=34742),  I realized not only did I not know how to properly sharpen a scrape, but also that I was spending way too much time on it.

A spoon bowl after being carved out with the gouge.
My die grinder with a 1" Kutzall Burr tool. Smooths out the gouge marks, but leaves lots of tool rash.
I don't have a proper electric die grinder, but this rotozip workskinda. It's as gentle on your hands as a jack hammer, but adding a ghetto-rigged speed-controller (consisting of an electrical box, two wall sockets, and a ceiling fan speed-controller) into the mix, makes it functional. It was free, as it should be, because the rotozip is a worthless tool in a fine woodworking shop.  It was a cast off from my fathers "putz-around-the-house-and-fix-things" tool museum.  I could write an entire blog about the stupid tools my dad buys (or maybe they're not so stupid; I'm using them), but still I wish he would consult with me about his tool purchases, because I'm the only one who is ever going to be using them. Anyway, it has made hundreds of spoons, but, thankfully, it is starting to sound more and more like the smoothie machine at an upscale coffee shop I frequent. (Why are they so loud? It's only a smoothie machine; it crushes soft fruit. How much horse power do you need for that?) This seems to me to be the death cry of my rotozip. It's my mission in life to kill this angry little misappropriated tool.

King Arthur Inflatable Round Sander attached to a drill press. Yes, this my dust collection hooda funnel + 15 ft of discarded pool hose + wire and zip ties = dust free sanding (almost free, cost about $3).
Spoons sanded and ready to oil.
Spoons!
I have used several different kinds of oil for my spoons and they all work just about as well. My steps for oiling spoons has developed over time to include a screwed up glaze or a self imposed fail safe to compensate for over looked mistakes. The first step is to oil the spoons and then get them out of the dirty shop. They are intended for use with food, so keeping them clean is a priority. Despite my own personal grooming habits, which are hit-and-miss at best, I do try and keep sawdust out of food. Oiling the spoons is the most satisfying step. Freshly oiled they look great (as seen above), but once again that nasty tool rash pops up. No matter how meticulous I am with my finish work, things get missed. After the first coat of oil I would love to relax, take stock in what I've done, and declare that "it is good", while moving on to my next woodworking triumph, but inevitably their will be flaws. The next step is to wait. After a day or two most of the oils are absorbed, but the grain remains bright making it a good time to check for dents and dings, preferably in sunlight.  Back in the shop they receive there final detail sanding/scraping and are now ready for an oil/wax finish. This waiting period is very important. It's real easy to eagerly anticipate the final product, but if I put something out there with a flaw that's the first thing people are going to see. It could be 99% perfect, but if there is one flaw people will notice. Pricky pickys! No, just humans obeying natural impulses to notice irregularities like a mother's inspection of her son heading out the door to church who will inevitably get a spit bath with an old Kleenex. It's also in my nature to get ahead of myself, but the "oil-wait-sand-wax" series of steps helps solve both those problems, however, age is the only thing that will eliminate the spit baths, eventually.

There are many different food safe products on the market such as food grade mineral oil, butcher block oil, and so on... I prefer walnut oil, because it smells the best. Right now, I'm using a oil/wax mix, which stays soluble when heated. I heat up and mix 4 parts oil with 1 part farmers market bee's wax. The bee's wax (as in "none of your..") keeps the wood grain brighter longer than oil alone.

Well, this article has succeeded in allowing for me to insult both my parents (Sorry, Mom; Sorry, Dad), to exploit you for a few cheep laughs, and gave you the final steps in How I Carve a Spoon. I'd be happy to answer any questions you may have about spoons or anything else you might have a question about.

Tuesday, June 12, 2012

How I Carve a Spoon

Part 2


In this week’s installment of the spoon carving picture narrative, we will look at the tools and methods I use to transform the initial chunky wooden block into a spoon with some sex appeal. Remember it’s all about curves, and a successful transition between the thick and thin parts is what makes the spoon interesting to both eye and hand.

The drawknife is my weapon of choice when tackling the faceted edges left by the bandsaw. 

The drawknife is an amazing tool in that it will make course or fine shavings based on the blades angle of attack.  Most tools need a manual adjustment to change cutting depth, but a drawknife can quickly be adjusted by the turn of your wrist. The drawknife will take a heavy cut relative to the blade angle, so holding the blade parallel to the work takes a smooth finish cut; while a higher angle takes a course cut.  It's all in how you hold the tool.

Ribbons of wood shavings left by the drawknife they will be cut off when the spoon is turned around in the shavehorse and removed from the other side.

A spoon roughed out with the drawknife. A more finished surface can be achieved with the drawknife alone, but at this point I like to switch to a spokeshave.
There are a couple of points I would like to make about the next set of tools used in the spoon making process. The first is to give credit to the woodworker who developed and refined the tools that I use, and the second point is to express the value of good tools. One woodworker I feel the need to credit for this segment is chair maker Brian Boggs and here is why. The spokeshave and the shavehorse redesigned by Boggs have actually taught me how to be a better woodworker and make the shapes of my spoons possible. No one taught me how to make spoons or woodworking; it's just something I wanted to do and started making it happen.  I consider these two tools in combination as my teachers.


Brian Boggs style shavehorse− this one was homebuilt by me. FYI The red line on the floor is the toe line for playing darts. Sometimes the shop doubles as the party barn. Not often but sometimes it still does.
Brian Boggs spokeshaves available from Lie-Nielsen (bottom), Stanley spokeshave (top). The spokeshave on the bottom has its cutting iron removed and the black lines on the handle were added by me to distinguish the flat bottom spokeshave from the curved bottom spokeshave. Otherwise, they look identical. The lines make it easy to identify when switching between multiple tools.


Most mentions of spokeshaves that I have read about in woodworking magazines refer to the spokeshave as an unloved and neglected tool, which the authors try to remedy with demos showing the tool in applications that the tool is not really good for. This is a tool that I use every day in ways that no other tool could match. And, in my experience there are a couple of reasons that this tool is so misunderstood. First of all, most spookeshaves aren't that good.  Secondly, it’s not a flush cut router or a compass plane. Even though the spokeshave has a wide 2" blade, it doesn't like making wide 2" cuts like a hand plane would.  Its best at taking off corners and rounding over the edges of square stock one narrow 1/8" cut at a time. Think of rounding and shaping a chair spindle vs. cleaning up a 1" inside or outside curve.

Wood ribbons made with a Stanley 151 spokeshave. I modified this flat bottom to a round bottom tool with a belt sander. The round bottom makes it easer to smooth a tight radius. In most cases I reserve the Lie-Nielsen's for finish work.


I learned how to use a spokeshave through trial and error using my vintage Stanley and a tail vise as a work clamp; it was more trying and erring than successes.  The old Stanley spokeshave that I picked up at a flea-market didn't do any more than chatter on wood leaving a surface so chewed up that I could have done a better job cutting wood with own teeth. The other problem is that using a vice to hold the work doesn't allow for rapid changes in repositioning the work and won't adequately secure the work for most angles of attack by a spokeshave. Quick positioning and repositioning of work is essential when working with a spokeshave, because like mentioned earlier, it shapes wood effectively removing a little bit of material with fast strokes vs. removing a course amount of material in a heavy cut.

A rasp is great for working the neck and rounding the bowl back even if it’s a cheep hardware store variety.  Hopefully some nice Auriou rasps are in my future−but even though I love great tools, I am still a tight wad on a limited budget.


Frustrated, I almost gave up using hand tools to make my spoons, then, I bought two Boggs style spokeshaves and built a Boggs style shavehorse. Eureka! These two perfect mates united for a love fest of success. These Lei-Nielsen tools are so perfect that they are forgiving of my inexperience and rewarding when I do things right. And, the shavehorse, with its foot clamp technology, held the work tight yet release quickly for rapid repositioning of the work.  I don't spend a lot of time in any one area, as with any sculpting process, the sculptor needs to move around the work. All the parts need to be worked equally. I won't allow myself to get hung up on any one area, because at this point I'm still roughing out the form. After learning from my Boggs style spokeshaves, I was able revisit my old flea-market find, and now know how to use it successfully. It's great for course work, and inexpensive enough that I didn't think twice about rounding the bottom, so the tool could cut a much tighter radius. Let the moral of this story be that great tools in the right applications will teach success.


Monday, May 28, 2012

How I carve a spoon

(Part 1)


There are a lot of different ways to carve a spoon. The methods I use are determined by the desired forms I'm looking for, my knowledge of woodworking, and what tools I have available to me. I try to use as many human powered tools as I can, but sometimes resort to using power tools, because of the age-old dilemma−lack of time, tools, or knowledge.
 I prefer hand tools, because they are quiet. The dog will come into my shop and lay under my feet, if I'm using hand tools, but runs away anytime I turn on a sander. Also, hand tools leave a better surface. Using a spoke shave or drawknife cuts the wood to a smooth polish, which is better at revealing grain qualities.

I have an admitted bias against power sanders that stems from my feeling better about what I make when I use traditional woodworking methods. Carving with hand tools is a more skilled process and one worth knowing, if your goal is to gain a more complete understanding of the woodworking process.  Carving a spoon handle with a drawknife on a shave horse takes practice; carving on a belt sander takes little more than a tolerance to dust.  But we live in the modern age and our modern time-savers have their place. Sometimes, after I have been carving spoons for 6 hours, I just want to get finished, so I can go have a drink with some friends or take a much needed nap.

 Getting to my point, what I try to do is strike a balance between tradition and time. Norm Abram and Roy Underhill are heroes of mine without conflict. My shop has enough room in it for both hand tools and power tools, which I will demonstrate with this pictorial narrative.


Step 1) Get a board; this is an off cut (1-1/2" x 2" x 12’) of Cherry

Step 2) Draw a spoon. This one is going to be around 17"long…

…after first cuts on the band saw.

Step 3) Cut out top profile on the band saw.

I do a lot of the initial carving freehanded on the band saw. This is a practice that cannot be endorsed by the American Council of Wood Shop Safety, but it is fast and relatively safe. 

Step 4) To open the bowl of the spoon I use a foot clamp by sitting on a short stool made just for spoon carving. It’s about a foot high and I'm about 6' tall, so this gives me plenty of foot power and puts the work at about chest height.

And let me define foot clamp as a clamp to hold down work by stepping on it with one’s foot.  It’s surprisingly effective. Note the spoon is on top of a shop mat, but I also use a piece of leather when I opt for carving outside.


Monday, May 14, 2012

The New Ghetto Workshop


This has been the season of the toolbox. The woodworking world is buzzing about the subject after the recent release and then re-release of Christopher Schwarz book The Anarchist’s Tool Chest. Its a great read and I was lucky to have found it at the beginning of my woodworking endeavors. Schwarz’s book proposes that a tool box is an essential piece of shop furniture because it will give woodworkers a finite parking space for their tools leading them focus on quality and not quantity of tools. Any good tool box should be designed to keep you efficient in your craft. Shwarz's book an many other great books/ blogs/ and resources can be found at www.lostartpress.com

The blue milk paint makes it look like the Tardis's little sister. Tool box space ship?

It's bigger on the inside than it is on the outside.
In progress note the dovetails, this was my first project to work with dovetail joiner. Not that hard.

So I made an Anarchist’s tool box, the finish is three coats of milk paint with a Tung Oil on top. The federal blue made it turn out looking like the Tardis’s little sister from the British TV's show Dr. Who. Like the Tardis, my tool is bigger on the inside than it is on the outside. It’s surprising at how much stuff this thing can hold. I would recommend that any woodworker starting out in the craft should take on a tool box as one of their first woodworking projects; yes, dovetails and all.

Let it be noted that I built a traditional tool box first, made from Cypress planed and dovetailed by hand. My second tool chest took on a different agenda. Power. I like working with hand tools, less dust, no noise, more precision; they are all around safer and more pleasant to work with. Working with hand tools all the time would be great but the reality is that I’m making an attempt to be a full time wood worker, and they are much cheaper than shop assistants, so power tools in some cases are still a necessity in my shop. If time and money weren’t an issue it would be a different story.

Tech help from John Reitzer-Smith

The second tool box I call the “Jam-box-tool-box”. It solves a couple of pesky shop problems: 1) In my shop I always wear earplugs. I use power tools often enough that it’s easer to just leave them in which makes listening to the radio more difficult, and 2) All those power tools require power. I looked into contractor radios, but they are all brand specific to whatever type of cordless drill you use. I don’t know what brand of cordless drill I’m going to have 10 years from now, so I came up with a universal contractors radio that will charge any battery, phone, or iPod, and power any tool I want it to power. It’s a multi tasking machine but lets not forget the most important feature remains that it-will-rock-you.

“Jam-box-tool-box”

It’s the only AM/FM CD/MP3/WMA with front/rear AUX and Bluetooth Ready tool box I know of.  I still have my grandfather’s tool box. My grandfather was a life long Iowa farmer and I know better, but sometimes I get sentimental about grandfathers way of life, a lost way of life we will never be able to go back to, and in hindsight I’m just romanticizing the simplicity of his life that probably wasn’t that simple. But I can’t think of a more fitting comparison between his life and mine than to show the difference between our tool boxes.

Grandpa's tool box on the Left circa 1910, “Jam-box-tool-box” circa 2012 
If he were still alive, I would build him one. I know he wouldn’t have gotten as excited about Jam-box-tool-box as I do, but he would have used it as an extension chord and as an am radio.  If Grandpa was working on the tractor he was blasting the farm reports, and if I’m in the woodshop I’m cranking out the NPR. Some things don’t change.

Thursday, May 3, 2012

Butcher block for a friend


Butcher block 23"x14" hard maple and mahogany

May 3, 2012

Hi all, this is the first post of my woodworking blog. I’ve been a serious woodworker for the last 3 years. The reason I’m making the decision to start a blog is to first and foremost is to educate people about what it means to be a woodworker in a society that has doesn’t understand the value of things and second, to promote my work and connect with other woodworkers.

Please note that good writing and photos will be sacrificed for timely and consistent posts.


Erik Tosten